Sunday, March 11, 2012

Turbo seals replacement


Parts needed...
Two turbo seals of different diameter.

Tools needed...
A large flat head screw driver.


 Two new turbo seals.Notice the different diameter.
Large seal goes on the outside of the air filter air outlet.
Small seal goes on the outside of the turbo intake.
 On the left is the air flow intake to the air filter.
On the bottom right is the output air flow beneath your air filter housing.

 Turbo air intake
This is the air collector from the air filter housing to the turbo
 Notice the inner groove on the large turbo seal.

 And the outer groove on the air filter housing.
 You want the grooves of the large seal to fit perfectly over the outer grooves of the air filter outlet housing.
 Now install the smaller seal over the turbo intake housing.
 Perfect fit.
 Now you can install your plastic air collector between your air filter housing and the turbo.


Banjo bolt cleaning.


Some people say I'm anal about this but I clean this banjo bolt every time I do my oil and filter replacement,and maybe you should too!

The benefits you ask???

What is it? Its a hollow bolt with a hole in the side to give passage.
What does it do? It passes intake manifold pressure to the ALDA.
Why does it need cleaning?   Oil sludge, carbon and other gunk builds up and plug’s the bolt and line.
What happens if the bolt or line are plugged or broken?   Massive power loss.

Warning:
Do NOT over tighten the Banjo bolt. You will strip the threads in the manifold.
Then? >>>     $$$$$
The only tools needed are
3/8 Drive ratchet with a 12mm socket or a 12mm ratchet wrench.


 The banjo bolt is located at the rear of the exhaust manifold,on the right side (passenger) of engine.
Notice the two washers,one on the inside and outside of bolt
 Bolt is removed.
 Clean with engine cleaner.
Oh by the way.This bolt is very expensive $30.00+ and is a special order through MB.Thought you might like to know
Reinstall and be gentle when you re tighten this bolt.
This is another item I like to clean out at every oil change.
And your done.

Air filtre rubber mounts replacement.


Air filter rubber mounts replacement.
I wouldn't say that these mounts should be replaced periodically   but after 20.000 miles or 40.000 km,they should be checked and replaced if they are broken.
Very easy repair...

Tools needed.
3/8 drive ratchet
3/8 drive medium extension
3/8 drive 10mm socket

Parts needed.
3 New rubber mounts with new bolts.I used bolts with plastic lock inserts.


 Remove the air filter cover and the filter.
Using your ratchet and socket with extension remove all three bolts at the bottom of air filter housing.
 You can see in this picture that the rubber mount broke off due to wear and tear and mostly vibration.
 These are new rubber mounts with bolts and plastic lock inserts.
 Install your new mounts by screwing them into the threaded holes on the air filter support.Then put bolts under each mount and use your ratchet and 10mm socket to get them nice and tight,this will help with the vibration and will secure the mounts for a long time.


First one

 Second one...

 Reassemble your air filter housing Add three new bolts with plastic inserts inside the housing on each mounts

Done!

Axle oil replacement om 123,126 Mercedes


 Always start by removing the fill plug first! That would be the top one.
 Your favorite gear oil...
 Tools needed.
Ratchet 1/2 inch drive
14mm Allen socket 1/2 drive
Extension tube for better leverage
Suction gun
 Drain the old gear lube oil.


 Using your suction gun, pull on the lever to siphon as much oil as you can into the gun then push the lever to add oil in the differential.

How to do thread repairs using HeliCoil insert kit


In this next segment I will show you how to install a HeliCoil on the transmission casting.
Several months ago I performed an oil and filter replacement on the transmission of a1983 300D (123) chassis.I noticed that when I was torquing my screws back in a few of them where not tightening at all or very little at best.The previous person who performed this did not pay any attention to proper specs on re torquing,and tighten them way too much.I have been living with a minor oil leak for all this time...
Well the next best thing to do is to install new inserts with a HeliCoil.


 This is my project car.1983 123.First of all secure your vehicle on ramps or floor jacks.Make sure to apply the emergency brakes.
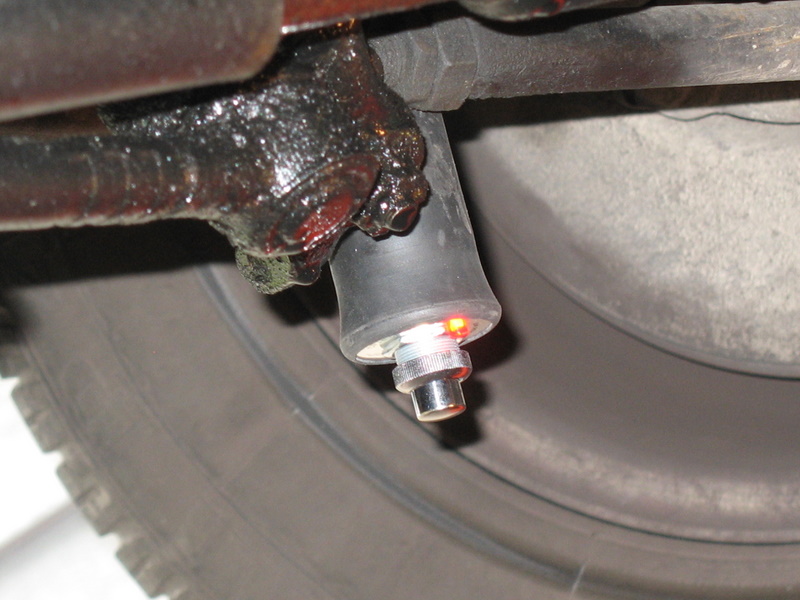
 Locate the hot box to connect your hand held remote starter,this particular one is located on the right side fender
 Now the tools you will need to do this.
HeliCoil set.This particular job required M8x1.25 (drill size diam)
Ratchet 3/8 drive
Short extension
Hex socket No 5
14mm socket
Drill
Drill bit 21/64
Torque wrench 3/8 drive
Phillips screw driver

 Connect your two wires from the remote to your hot box.One on the starter wire and one on the positive wire going to your battery.

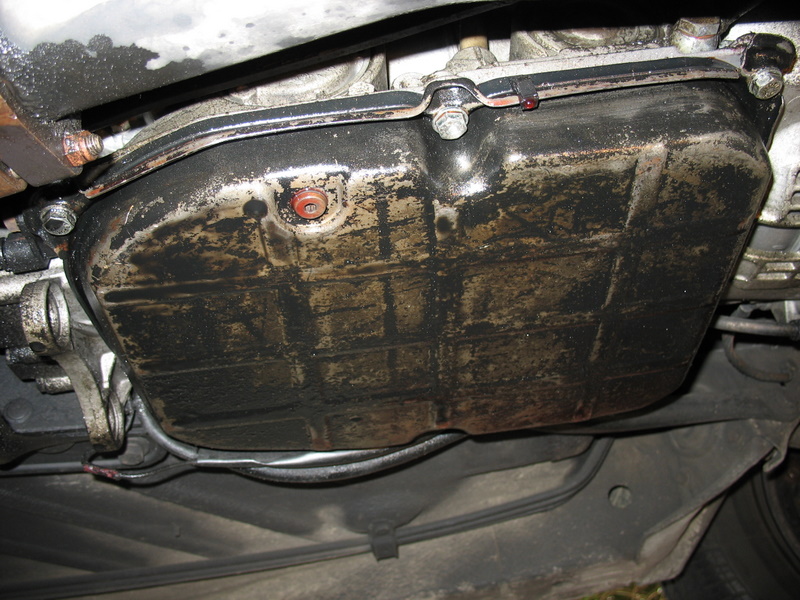
 This is the oil leak.Transmission oil pan

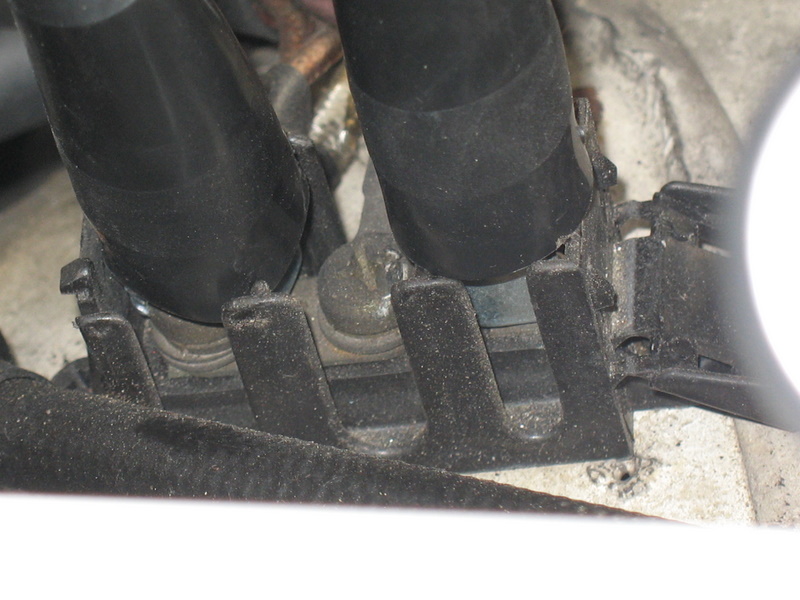
 Now its time to locate the drain plug located on the torque converter.
 This is the HeliCoil kit.
12 inserts
Tap
Special tool to install inserts into casing.
12 inserts
Tap
Special tool to install inserts into casing.


 Torque converter is draining,there could be anywhere from one to two liters of oil in it.
 This light confirms that the remote is properly connected,red light on remote is on.
 Then drain the transmission oil pan using Allen socket No5
 Its imperative that you clean the transmission oil pan and dry it thoroughly.Use engine cleaner   or degreaser for best results.

 Now its time for business.
The oil leaks were from the two rear screws left and right hand.
Once the oil pan is removed and the continuing oil drainage is almost complete,drill a hole straight in in both the holes that need help.
 You have to drill perfectly straight.
 Then using the tap provided with your kit,start screwing in your tap straight and deep enough to be able to enter an insert.
 Its a tedious process but take your time be patient and success is on its way.


 Don't think I was the one taking the pictures....My daughter was kind enough to ruff it up and lay down under the car to take these pictures for me....Thanks Shelby!
Great Pictures sweety!


 After finishing your threading its time to use the special tool provided in your kit and install your inserts.
 Screw in the inserts until you reach 1 to 1.5mm inside the casing.


 In this picture i removed the special tool to show you the insert in the transmission casing.
This is how it should look after completion.Your insert should be 1 to 1.5mm inside the casing.
 Install your new oil strainer.

 Re tighten all screws to specs 6 ft pounds NO MORE NO LESS!
Mission accomplished.
No more leaks total oil added approximately 7.5 Liters
Now a tally on the cost...

HeliCoil Kit.....$58.00
Transmission strainer and pan gasket...$38.00
8 Liters of Dextron III.....$16.50
2 Transmission oil pan screws OEM.....$6.00
Grand total....$118.50
I had a written estimate done at a MB Dealership.....pretty much the same work....$857.00 + taxes
Now....Who's your Daddy??